You’re standing in the kitchen, halfway through a pumpkin pie or a creamy pasta sauce, and you realize the pantry is empty. No little carnation-colored can. It’s frustrating. Most people think they have to run to the store, but honestly, a recipe for evaporated milk is just one ingredient and a bit of patience.
It’s just milk. That’s it.
You’re basically just playing a game of chicken with evaporation. You want the water out, but you don't want the sugars to burn. If you’ve got a half-gallon of Vitamin D milk in the fridge, you’re already halfway to the best mac and cheese of your life.
What Actually Is Evaporated Milk?
We should probably clear something up first because people get this mixed up constantly. Evaporated milk is not condensed milk. If you add sugar to this process, you’ve made sweetened condensed milk, which is a different beast entirely. Evaporated milk is shelf-stable milk that has had about 60% of its water content removed through heating.
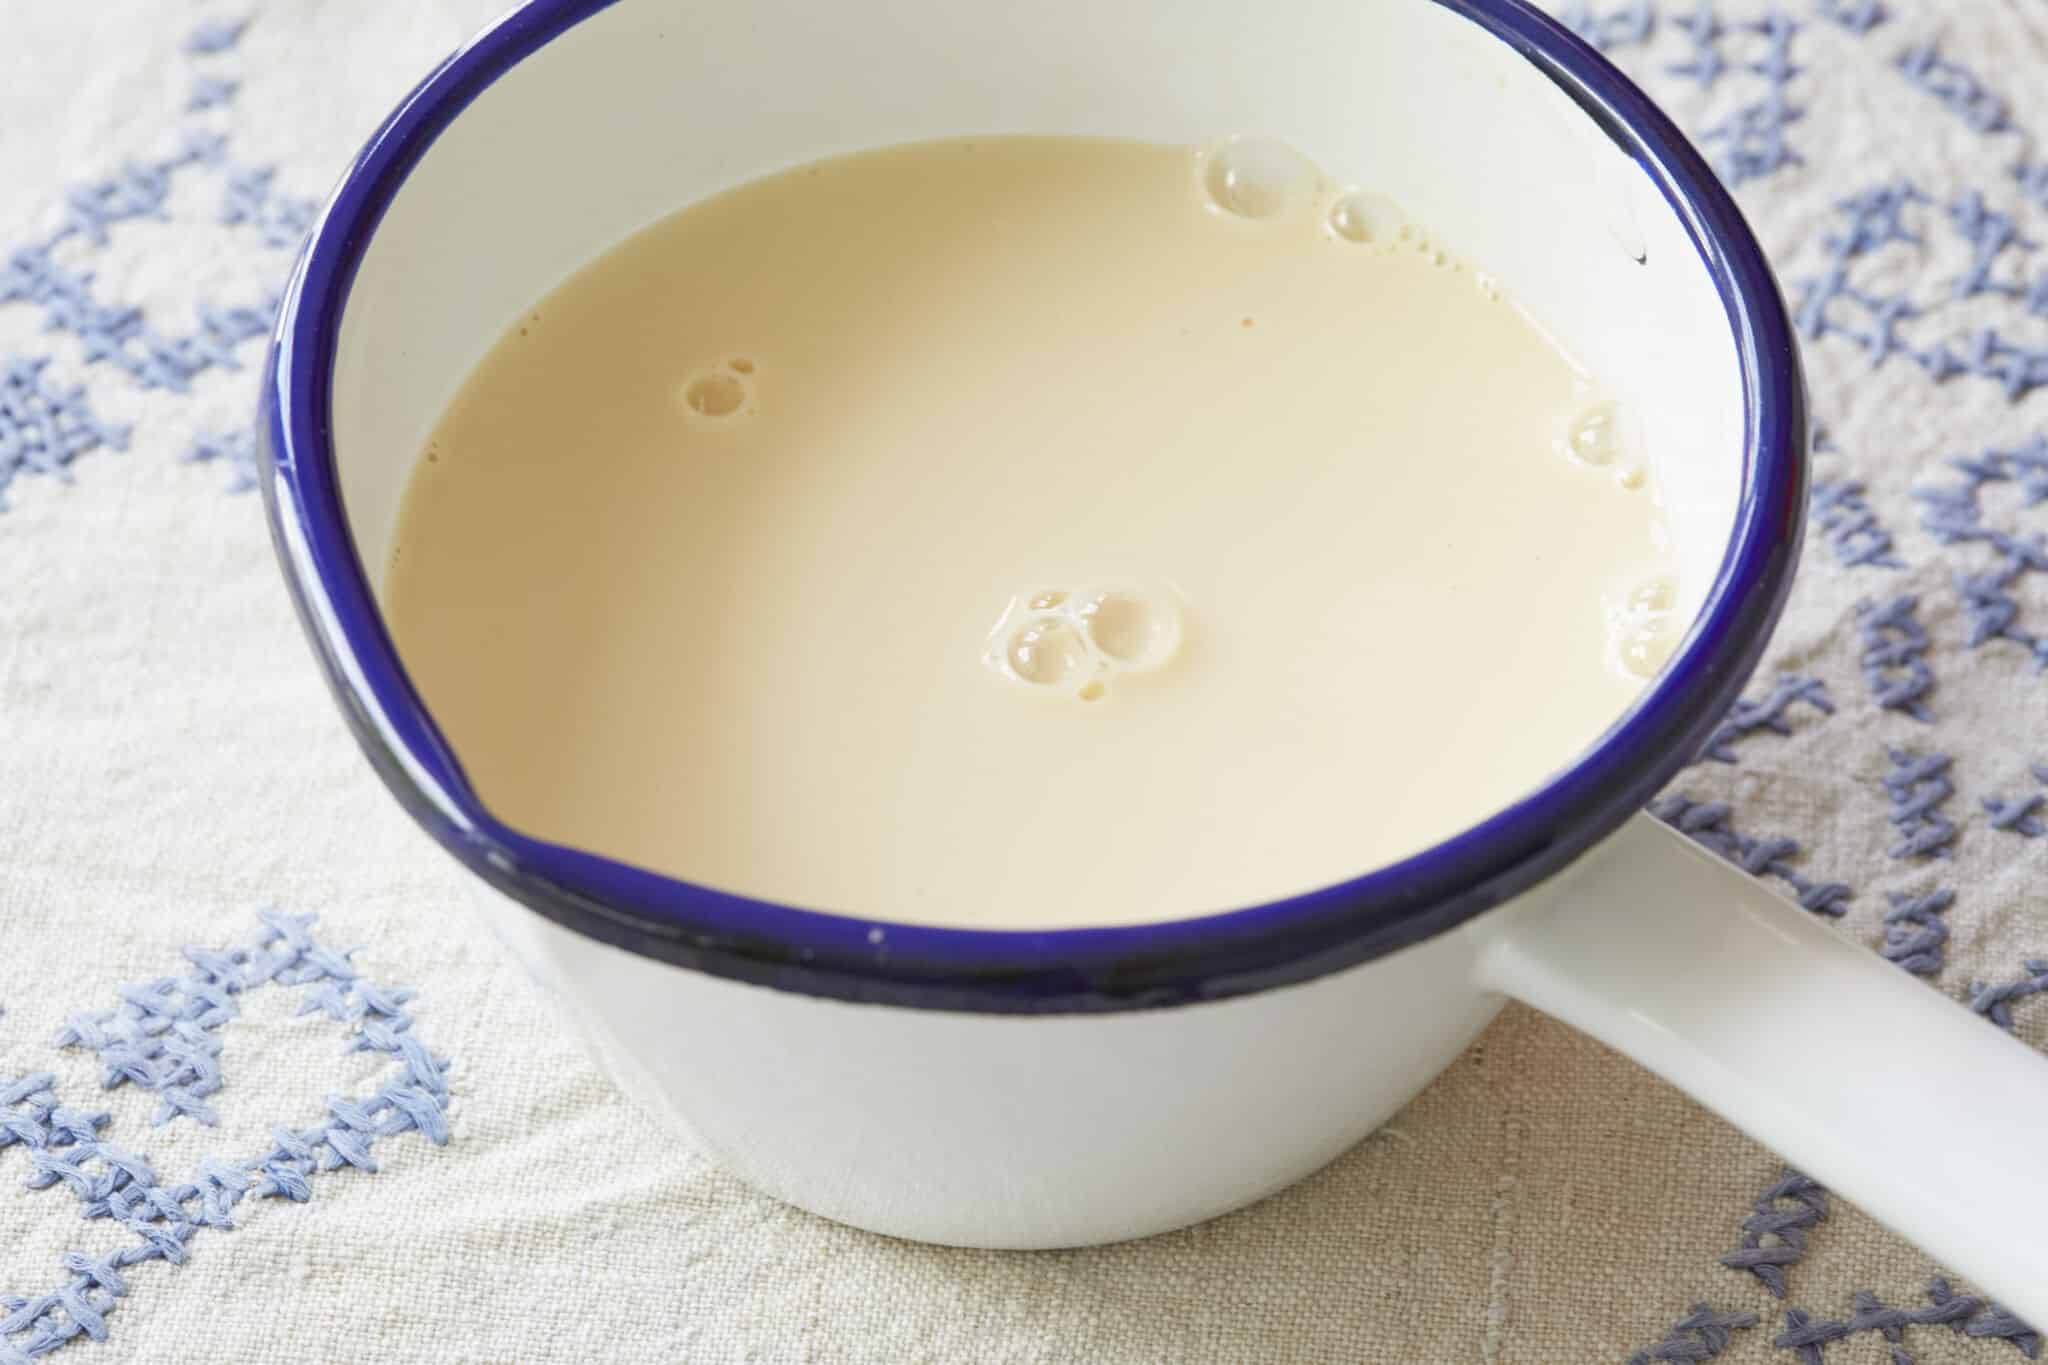
It’s thick. It’s creamy. It has a slightly caramelized, "cooked" flavor that regular milk lacks.
The stuff in the can—the stuff Gail Borden patented back in the 1850s—is processed using vacuum evaporation. They lower the air pressure so the water boils off at a lower temperature. This keeps the milk from tasting "burnt." Since you probably don't have an industrial vacuum sealer in your kitchen, we use the stovetop. It takes longer, and the flavor is a bit more complex and nutty because the milk solids actually toast a little bit.
The Science of the Simmer
When you heat milk, a few things happen at once. First, the water molecules get excited and turn into steam. That’s the "evaporated" part. Second, the proteins and sugars (lactose) undergo a subtle Maillard reaction. This is the same chemical magic that makes toast brown or steak sear.
In a DIY recipe for evaporated milk, this reaction is more pronounced than in the commercial version. Your homemade version will look a bit more ivory or cream-colored than the stark white stuff from the store. That’s a good thing. It means more flavor.
The Step-by-Step Reality
Don't overcomplicate this. You need a heavy-bottomed saucepan. If you use a thin, cheap pot, the milk will scorch on the bottom before you even get close to the finish line.
- Pour 30 ounces (about 3 ¾ cups) of regular whole milk into your pan.
- Set the heat to medium. You aren't trying to boil it aggressively. You want a gentle, steady simmer.
- Stir. Then stir again. Use a silicone spatula so you can scrape the bottom.
- Keep this up for about 25 to 30 minutes.
You’re looking for the volume to drop by a little more than half. You should end up with exactly 12 ounces (1 ½ cups) of liquid. That is the standard size of a commercial can.
Why Whole Milk Matters
Can you use 2%? Sure. Can you use skim? Technically, yes, but why would you? The whole point of evaporated milk is the richness. If you use skim milk, you’re essentially making a concentrated version of "watery milk," which doesn't really help your coffee or your casserole.
The fat in whole milk (about 3.25%) concentrates along with the solids. This creates a mouthfeel that mimics heavy cream but with significantly less total fat. It’s a culinary bridge.
Common Mistakes That Ruin the Batch
The biggest mistake is walking away. Milk is temperamental. It’s like a toddler; the second you turn your back, it’s a disaster.
If you let the milk boil over, it’s a nightmare to clean. If you don't stir, a skin forms on top. That skin is made of coagulated proteins (whey and casein). While it’s not harmful, it creates weird little rubbery bits in your final product. If a skin forms, don't panic. Just whisk it back in or, better yet, strain the whole mess through a fine-mesh sieve when you’re done.
The Heat Level
Keep it low. If you see big, aggressive bubbles, turn it down. You want those tiny, "champagne" bubbles. High heat breaks down the fat globules and can cause the milk to "break" or curdle. If it looks grainy, you went too hot, too fast.
Is Homemade Actually Better?
Honestly, it depends on what you're making. For a standard pumpkin pie, the canned stuff is incredibly consistent. It’s engineered to be perfect.
But for savory dishes? Homemade wins.
Think about a creamy potato soup. If you use your own recipe for evaporated milk, that slight toasted-sugar note adds a depth that the canned stuff can't touch. Plus, you know there are no added stabilizers like carrageenan or dipotassium phosphate. It’s just milk.
Dietary Substitutions and Hacks
We live in an age of alternatives. What if you’re vegan? Or lactose intolerant?
The Dairy-Free Version
You can apply this exact same method to nut milks, but results vary wildly. Almond milk doesn't evaporate well; it just gets kind of... dusty tasting.
Coconut milk is the best alternative. You can simmer full-fat coconut milk down, but honestly, it’s already quite thick. Oat milk is the rising star here. Because of its starch content, it thickens beautifully as the water leaves. If you're making a vegan recipe for evaporated milk, use a "Barista Edition" oat milk. It has the fat content necessary to hold up under heat.
The "Cheat" Method
If you're in a massive rush and don't have 30 minutes to stand over a stove, you can whisk together ¾ cup of whole milk and 1/3 cup of heavy cream. It’s not technically evaporated milk, but for the sake of fat content and consistency in a recipe, it’ll get the job done without ruining the texture of your dish.
How to Store Your Creation
Since this isn't pressurized and canned in a factory, it won't last months in your pantry. Treat it like fresh milk.
Put it in a glass jar (Mason jars are perfect). Let it cool completely on the counter before you put the lid on—otherwise, condensation will form inside the lid and drip back down, watering it down. It’ll stay fresh in the back of the fridge for about 5 to 7 days.
Don't freeze it. Well, you can, but the fat will likely separate when it thaws, leaving you with a weird, watery, chunky mess. If you must freeze it, plan on using it only in cooked dishes where you can whisk it back together under heat.
Practical Applications for Your DIY Batch
Now that you’ve got 12 ounces of liquid gold, what do you do with it?
Most people use it in baking, but its real power is in emulsions. Because it’s concentrated, it acts as a stabilizer. If you’re making a cheese sauce, evaporated milk is your best friend. It prevents the cheese from "oiling off" (that gross layer of yellow grease on top of mac and cheese).
- Coffee Creamer: Use it straight. It’s richer than half-and-half but has a unique sweetness.
- Fudge: This is the secret to that "old-fashioned" fudge texture that isn't grainy.
- Smoothies: A splash adds a creamy hit without the calories of ice cream.
- Mashed Potatoes: It makes them velvety without making them runny.
Actionable Next Steps
If you want to master this, don't wait until you're in a "baking emergency" to try it.
Start by making a half-batch tonight. Take 1 ½ cups of milk and simmer it down to about ¾ cup. Use it in your morning coffee tomorrow. Notice the difference in the "body" of the coffee.
Check your equipment. If your only pot is a thin stainless steel one, go buy a heavy-bottomed Dutch oven or a high-quality saucepan with a copper or aluminum core. It makes all the difference in heat distribution.
Finally, grab a digital kitchen scale. Measuring by volume (cups) is okay, but measuring by weight (grams) is how you get professional results. A "can" of evaporated milk is 12 fluid ounces, but it weighs more than 12 ounces of water because it's denser. Aim for a 60% reduction in weight for the most accurate results.
Stop relying on the grocery store for things that are already in your refrigerator. It’s cheaper, it tastes better, and you get the satisfaction of knowing exactly what’s in your food.
Start the stove. Grab a spatula. Just keep stirring.
Key Insights for Your Kitchen:
- Ratio: Start with roughly 2.5 times the amount of milk you need for the final result.
- Visual Cue: The milk should be the color of a manila folder, not white.
- Cleanup Tip: If you get a burnt ring at the bottom of the pot, soak it with baking soda and vinegar immediately. Don't scrub it while it's hot.
- Health Fact: One cup of evaporated milk has more calcium and protein per tablespoon than regular milk, making it a nutrient-dense addition to soups for kids or the elderly.