You've seen the videos. Someone sits in a chair with fuzzy, natural hair and gets up six hours later with waist-length, glass-smooth plaits. It looks like magic. But if you’ve ever tried it yourself, you know the struggle is very, very real. One wrong move and you’re looking at a lumpy mess or, worse, a receding hairline. Learning how do you braid with weave isn’t just about the hand movements; it’s about the tension, the hair prep, and honestly, the finger endurance.
Braiding with extensions (or weave, as we mostly call it) is the backbone of the protective styling world. Whether you're going for box braids, knotless, or cornrows, the goal is basically the same: seamless integration. You want the synthetic hair to look like it’s growing out of your scalp, even if everyone knows you weren’t born with 30 inches of Kanekalon.
Most people fail because they rush the start. They grab a hunk of hair, shove it against the scalp, and hope for the best. That’s a one-way ticket to "Traction Alopecia Town." If it hurts, you're doing it wrong. Period.
The Prep Work Nobody Actually Does (But Should)
Before you even touch a pack of hair, your natural hair needs to be in its best shape. You can't just slap weave onto dirty, dry hair and expect it to last.
Start with a clarifying wash. You need to strip away the old gels and oils so the weave has something to "grip" onto. If your hair is too slick from heavy conditioners, the braids will slide right off in three days. After washing, use a light leave-in. I’m a huge fan of the African Pride Olive Miracle line or something similar that adds moisture without the grease.
Now, the blow-dry.
Some people swear by braiding on damp hair. Don't do it. Damp hair is at its most fragile and most elastic. When you wrap tight synthetic fibers around wet hair and it dries, the hair shrinks but the weave doesn't. This creates massive tension. Blow-dry your hair on a medium heat setting using a "tension method"—stretching the hair out with your fingers or a paddle brush. This makes the parting process a million times easier.
Choosing Your Extension Hair
Not all hair is created equal. If you're doing classic box braids, you’re looking for Kanekalon or pre-stretched braiding hair. X-Pression is the industry standard for a reason. It’s got that slightly crinkled texture that mimics textured hair, which helps it stay locked in place. If you buy the cheap, super-shiny stuff that looks like doll hair, it’s going to be slippery. You’ll be fighting it the whole time.
How Do You Braid With Weave Using the Feed-In Method?
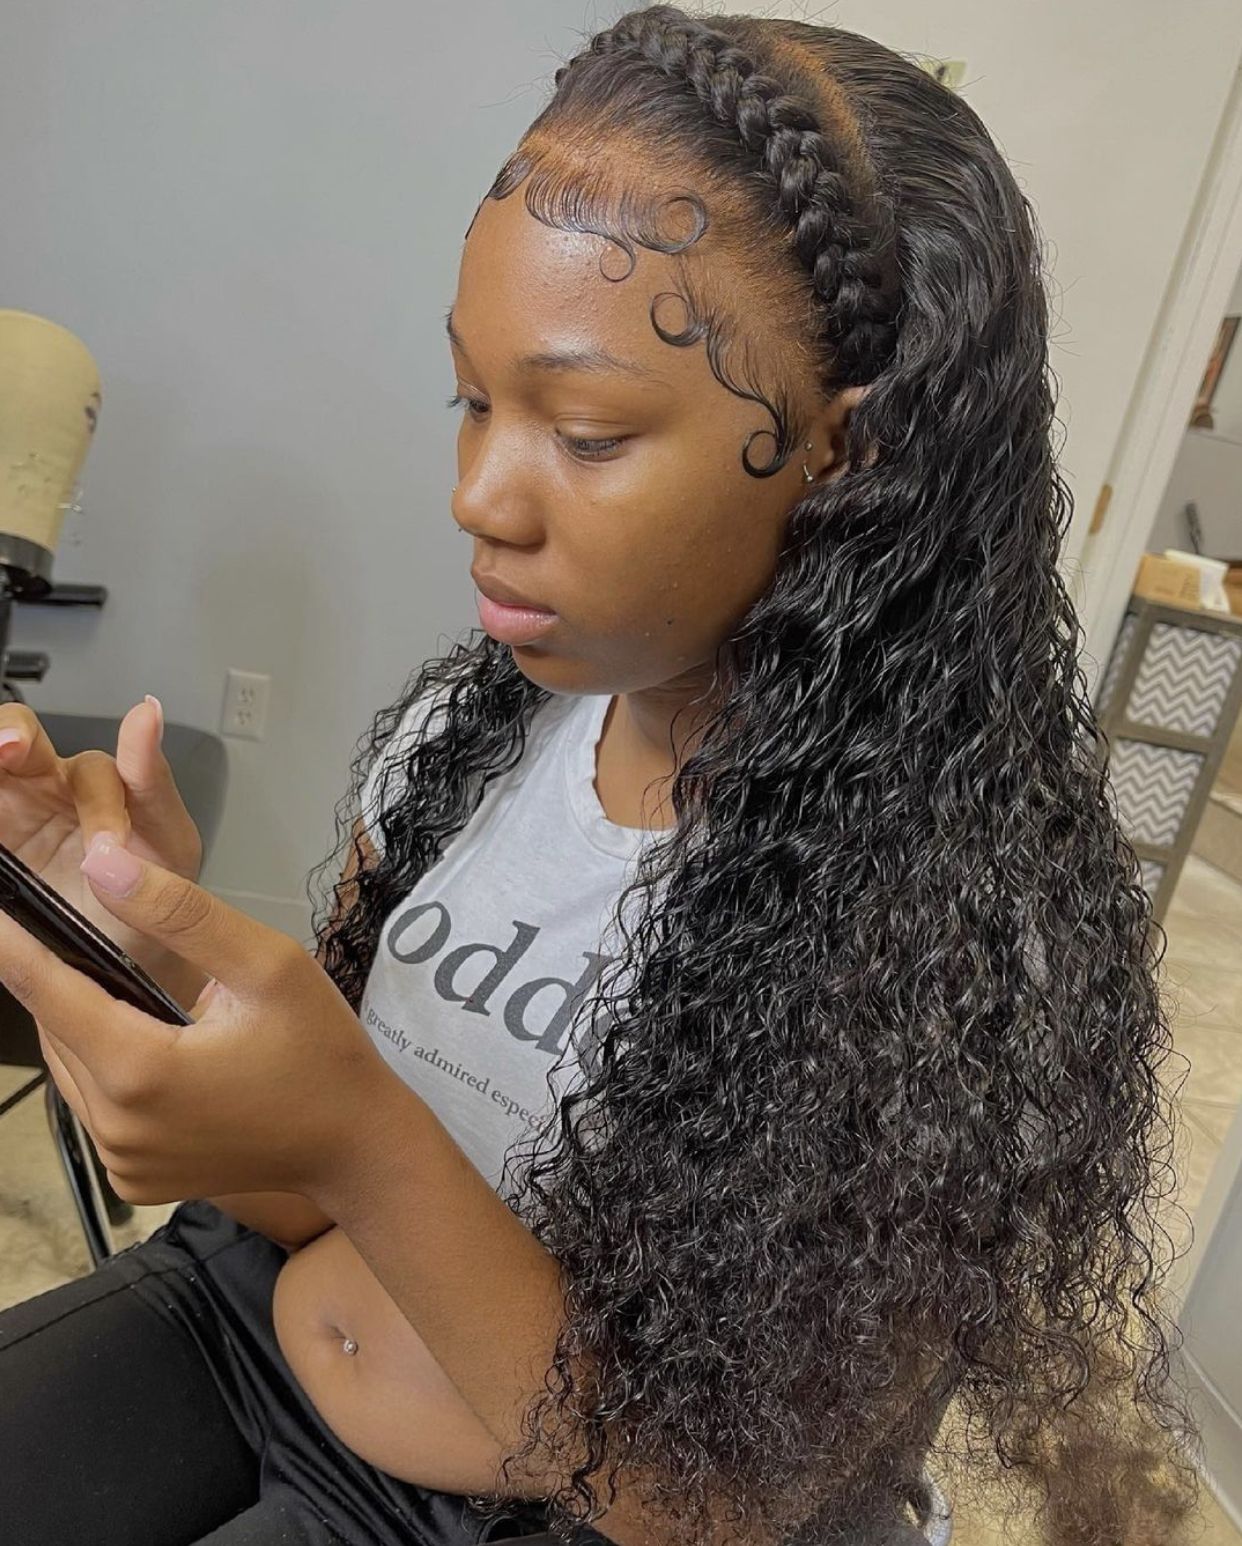
This is where the artistry happens. The feed-in method—often called knotless when we’re talking about individual braids—is the gold standard. It looks natural. It feels light. It doesn't put that "anchor" weight on your roots right at the beginning.
Here is the secret: you start with your own hair.
Take a small section of your natural hair and divide it into three. Cross them over once or twice to establish the base. This is your foundation. Once you have that tiny "knot" of your own hair, you slide a very thin strand of the weave hair between your thumb and index finger, merging it with two of your natural strands.
- Start with your natural hair.
- Cross twice.
- Add a tiny sliver of weave.
- Braid two more rotations.
- Add another slightly larger sliver.
Keep doing this until the braid is the thickness you want. This gradual build-up is why knotless braids don't have that bulky "knot" at the scalp. It’s also why they don't hurt. If you feel a sharp pinch, you’ve added too much hair too fast or pulled too tight. Back off.
The "Traditional" Method: The Loop and Lock
Maybe you aren't ready for the finesse of feed-ins. The traditional method involves looping the weave hair around your natural hair section to create a "knot" at the base.
You take a section of extension hair and fold it in half so it looks like a "U." You place your natural hair section in the middle of that "U." Now you have three strands: the two ends of the weave and your one strand of natural hair. You start braiding normally.
The trick here is the "twist-over." To make it look professional, you need to tuck your natural hair under the synthetic hair as you go. If your natural hair is sticking out like little frizzies all the way down the braid, it looks amateur. Use a bit of Edge Booster or Shine 'n Jam on your natural hair as you braid to "glue" it into the synthetic fibers. It makes a world of difference.
Finger Placement Matters
Your hands are going to cramp. It’s inevitable. To minimize the pain, keep your hands close to the scalp. The further away your hands are, the less control you have over the tension. It’s a game of millimeters. You want to keep your pinky fingers anchored against the person's head (or your own) to stabilize the braid.
Maintaining the Vibe
You spent eight hours doing this. Don't ruin it by ignoring it.
The biggest misconception is that you don't have to wash your hair when it's in braids. Wrong. Your scalp still produces sebum. Dead skin still builds up. Use a diluted shampoo in a spray bottle. Focus on the "alleys" between the braids. Rinse it out thoroughly.
And for the love of everything, wear a silk or satin scarf at night. Cotton pillowcases are moisture thieves. They will suck the oils right out of your hair and leave your braids looking fuzzy and old within a week.
Dealing with the "Itch"
We've all seen the "patting the head" move. Synthetic hair is often coated in an alkaline spray to make it heat-resistant and flame-retardant. This coating is what causes that maddening itch.
If you have a sensitive scalp, soak your braiding hair in a mixture of water and Apple Cider Vinegar (ACV) before you install it. You’ll see a white film lift off the hair—that’s the stuff that makes you itchy. Rinse it, let it air dry, and then braid. Your scalp will thank you.
Why Tension Is the Silent Killer
We need to talk about those tiny white bumps. If you see them along your hairline after braiding, you’ve gone too tight. Those bumps are literally your hair follicles being pulled out of your skin.
It’s a myth that tight braids grow hair faster. In fact, it’s the opposite. Constant tension causes inflammation, which can lead to permanent scarring and hair loss. If you’re asking "how do you braid with weave" because you want to grow your hair out, remember that the "protective" part of "protective styling" only works if the style isn't actively damaging your scalp.
Common Mistakes and Quick Fixes
- The Braid is Heavy: You used too much hair. Try to match the density of the extension to the density of the natural hair section. If the section is small, the weave should be thin.
- The Ends are Unraveling: Dip them in boiling water. This "sets" the synthetic fibers. Just be careful—keep a towel nearby to catch the drips so you don't burn your back.
- Slippage at the Nape: The hair at the back of the neck is usually finer and softer. Use a slightly smaller amount of weave and maybe a bit more "grip" product like a wax-based jam.
- Visible Parting: Use a rat-tail comb with a metal tip. Precision is everything. If your parts are messy, the whole style looks messy.
Getting That Professional Finish
The difference between a "home job" and a salon finish is the "lay." Once you're done braiding, apply a generous amount of foaming mousse—something like Lottabody or Mousse Def. Wrap the hair with a strips of Sanek paper or a tight silk scarf and hit it with a blow dryer for five minutes. This flattens any flyaways and "melts" the braids into each other.
Honestly, it's the step most people skip, and it's the one that makes you look like you spent $300 at a shop.
Actionable Next Steps
- Start Small: Don't try to do a full head of micro-braids on your first go. Practice on a mannequin head or a very patient friend with large, jumbo box braids. It helps you get the finger rhythm down without the pressure of a 10-hour session.
- Check the Scalp: Every two days, apply a light oil (like jojoba or peppermint oil) to your parts. This keeps the skin hydrated and helps prevent the "tight" feeling.
- Know When to Let Go: Do not keep braids in for more than 6 to 8 weeks. Your hair starts to mat at the base, and the weight of the new growth can cause breakage. Take them out, give your hair a break for at least two weeks, and deep condition like your life depends on it.